Creating and Commenting on Design Issues in Github

Using Github as a designer can feel foreign, but the benefits are well worth it. In this article I'm going to share some tips and processes that work for our team; hopefully they work for you too!
Creating and Labeling Your Issue
Github is predominantly a development tool, but using it to keep track of new designs and enhancements is incredibly efficient and time-saving. Github allows designers and developers to work side-by-side through the entire product management process. The first thing you need to do is file a design issue. It could be a UI enhancement to a filter dropdown or it could be an epic issue for a new messaging platform. Whatever the issue may be, you want to appropriately structure, label, and assign it. Labels are highly important as they aid users in knowing what kind of task they've been assigned to, and in what stage of the design process the issue is in. A couple of handy labels to have is an "In Progress" label so that users know what is currently being worked on, and a "Ready" label so that users know what is ready to be worked on.
Naming Your Artboards
Once your Sketch designs are ready to go, you need to make sure all of your Artboards are neatly and consistently named. A pattern that I like to follow is broad to specific. An example might be:

I start with the client name, the project name, mobile or desktop if applicable, then the specific screen name, and if it's a state for a form or interaction, I add that descriptor at the end. This pattern perfectly organizes your files but it may not work for you. Just make sure that whatever pattern you do establish is consistent and well organized so that your files are easy to find within your computer's file structure.
Commenting Designs into Your Issue
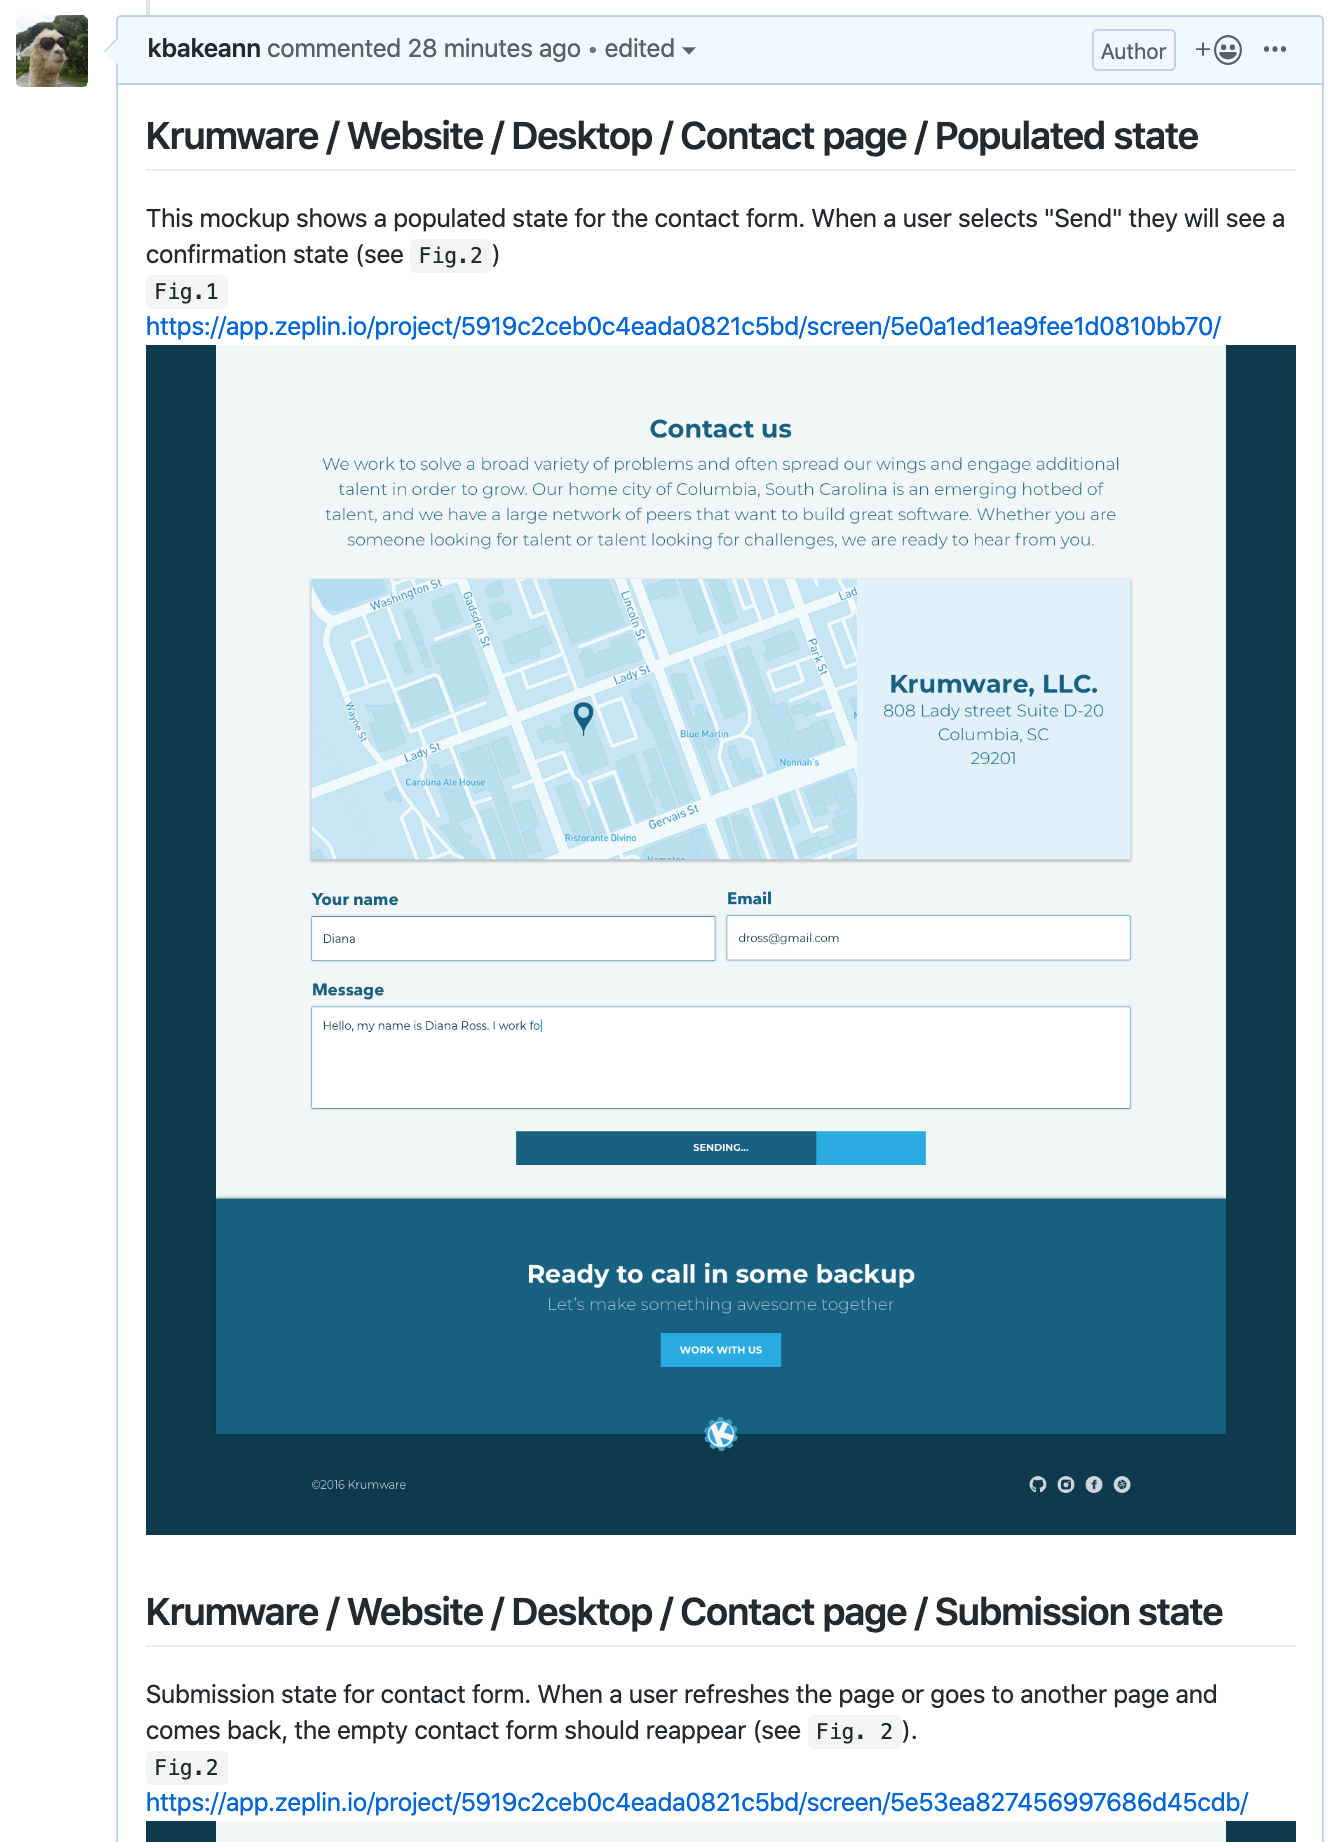
Now that your designs are properly named, let's get them into Github. Commenting on an issue is easy, but formatting and organizing your comment can get pretty messy, especially if you have multiple screens with a lot of notes and specifications. Here's an example of how I like to do mine:
[Feedback Note: Need to scrub Zeplin link, there are ways to access the unauthenticated projects]

As you can see I have headers, specifications, figure labels, Zeplin links, and images for each screen. Headers help break up the monotony of text and screens, and give your comments hierarchy. Figure labels number images, allowing you to reference Fig. 2 in the specs for Fig. 1, etc. (this is good because design flows are rarely ever linear!). This also allows other designers and even developers to easily refer to specific screens that they have feedback on or questions about.
Once your comment is appropriately formatted you'll want to select "Preview" at the top of your Github comment area to make sure that everything is in order. If it looks up to code, go ahead and smash that "Comment" button and update your "In Progress" label to "Review Me". This lets other designers know that your work is ready for review. Now other designers can look over your mockups and leave comments with any feedback or questions they may have. Not only does this allow for conversation, it also creates a paper trail of your progress (this is great to have in case of any confusion or discrepancies you may run into down the road and also sets you up for a great case study!).
Taking Action
After going back and forth, making changes, and finalizing your designs, your work is ready to ship to development. A good label to have at this stage of the process is "Ready for Dev". This lets you know that it is time to create a development issue, so go ahead and create that and always remember to link the original design issue within your development issue! You can now close the design issue.
There are many great ways to use Github, but the key is consistency and finding the right work flow for you and your team; And don't be overwhelmed! Github can be intimidating at first, but once you get into the groove, you and your development team will be an unstoppable combination!

